
Building a Suction / Vacuum Table for Paper Conservation and Restoration
- Apr 25
- 6 min read
Updated: May 2

It seems like my frame shop is more and more turning into a MakerSpace. Since I have the luxury of time and space to learn, build and try things, well....its quite a fun way to spend ones day in semi-retirement. Now I know how Adam Savage feels every day!
A customer came in this week with a diploma which was not very old, but was printed on some parchment style paper but had some tide lines from water damage. She wanted me to restore it and correct the water damage and then have it framed. I was pumped at the prospect.


So research away I went and as I tend to do more and more every day, heavily leveraged AI for the task, feeding in my general direction, recipes and asked for recommendations. Hence it pointed me to the best way to approach this was to use my existing recipes based on Calcium Hydroxide Ca[HO] along with Triton X-100...but not as a wet batch, but via a Suction Table.
There were lots of examples on building suction tables but primarily used for molds and set/prob building, but none really specifically for paper conservation. But many of the same concepts apply and Gemini AI helped me create a general build plan as follows:

Now I am not going to get into the science of everything and will leave that for you to investigate on your own, I am just going to focus on the build for now. I had considered making a nice big table that could handle a one-sheet size poster, but then after factoring in various elements like cost, multiple zones needed for suction, existing materials I had, i went with an 18" x 24" size. This allowed me to use a spare ShopVac which had a volume of approximately 90 cfm...its a single speed but I can vary the suction with a bleed valve on the vacuum hose.
The cost of this was basically around $100 as I had the ShopVac, wood scraps, extra epoxy resin from another project, and most of the PVC. What I needed to buy was:
1/2" sheet of HDPE (24"x36") of which I will only use half ($60 on Amazon)
I will cut this in half and use the other undrilled half for a top platform when weighting the documents.
PVC T-connector, 2" end caps x2, 3' of 1" PVC pipe, 3' of 2" PVC pipe ($15 at my local Ace Hardware for the pieces I didn't have around the shop.
Set of 10 1/16" jogger drill bits ($12 on Amazon)
This broke after 100 holes: Specialty drill bit specifically for plastic ($20 on eBay)
When I got this drill bit which cost $20, it broke after around $100...that may be do to me not using a drill press so decided to just go with cheap HSS drill bits and assume I will break some. I will say that while the plastic specific drill bit worked, it worked VERY well.
1" x 1/16" strip of Neoprene ($17 on Amazon)
I originally went with 1/8", but decided to drop it down to 1/16", I didn't want to have too much displacement between the pillar height and the plenum - partially due to the neoprene you buy may be very firm and not have much give.
Fostner bit 2-3/8" to run the PVC through the side ($16 on Amazon) - I just got a cheap one as not something I expect I will need too often.
5 or 10 1/16" drill bits, standard jogger bits are fine.
I probably bought some other things that I ended up not using. I made the basic box with a plywood bottom and 3" x 3/4" pine and poplar sides. I glued it all together and tacked with some brads. The 3" was key to allow me to make a "T" shaped manifold which will end up about 2-5/8" in height and have enough room above it to have good air flow.

Basic box build with "T" manified and support pillars.
The support pillars are used to keep the HPDE from bowing down from the suction. I used the table saw to cut groups at the top so that suction can still get to the holes they cover up. I will make a note that I had a scary moment cutting the 2" PVC on the miter saw and ended up with a couple shallow cuts on my hand when it got out of hand as it sailed 10 feet across the room....be careful - it gave me a deep respect of cutting PVC using woodworking tools - dangerous.
So next was to get the inside sealed with epoxy resin and secure the support pillars...I didn't have a photo of just that step, but this is one with the epoxy applied on the bottom, hole drilled for the manifold and everything in place. I put some epoxy on the bottom to hold the manifold in place and more around the exit hole to ensure an air tight enclosure.

You can see that I ended up using an adapter that goes down to a 1.5" hose to the ShopVac. This was intentional as during a test run the suction was pretty heavy even with the bleed valve wide open, but I have both a 1.5" and a 2.25" version of the adapter with bleed valves which I can use depending on the final section with the holes.
I should get the HDPE sheet in next week and then I will use my template to drill some 1500 1/16" holes....fun. Lay down the Neoprene seal on the edges and the suction will keep it in place during use, allowing me to easily remove and clean as needed as it will get moist inside and we don't want mold to cultivate.

While I am working on this some more, you can plug this text into the AI tool of your choice (ChatGPT, Gemini, etc.) and get an overview of how this will be used...I tried this on both ChatGPT and Gemini with good content results. Note that while these AI tools are great, I do spend a good bit of time validating the results they come back with:
How can I use a section table for removing tide lines on parchment-style paper (not skin) using Calcium Hydroxide and Triton X-100?
My technique will basically be to spray atomized distilled water from 12"-18" to minimize the hydroscopic shock and relax the paper. Then I will apply localized Ca[OH]+X-100 solution to the tide lines working slowly from outside in, then do a cleaning rinse with distilled water. Let the vacuum run for 3-5 minutes, then create the stack of blotter paper - hollytex - document - hollytex - blotter paper and sandwich this under a top covering of a piece of HDPE and weighted with equivalent of 15 lbs or so, leaving this for 20 minutes...swap out the blotter paper than let it sit for 24 hours.
Anyway....I am in drilling mode for a few days, turns out the drill bit only made it to about 100 holes so had to order some drill bits on Amazon, decided to just get normal jogger drill bits since the single plastic special drill bit cost $25, figured this is a more cost effective way even though its not as clean a cut. By the time I was done, I ended up going through 8 or 10 drill bits, as most broke after 40 or 50 holes, but you can get 20 of the cheap drill bits for under $15.
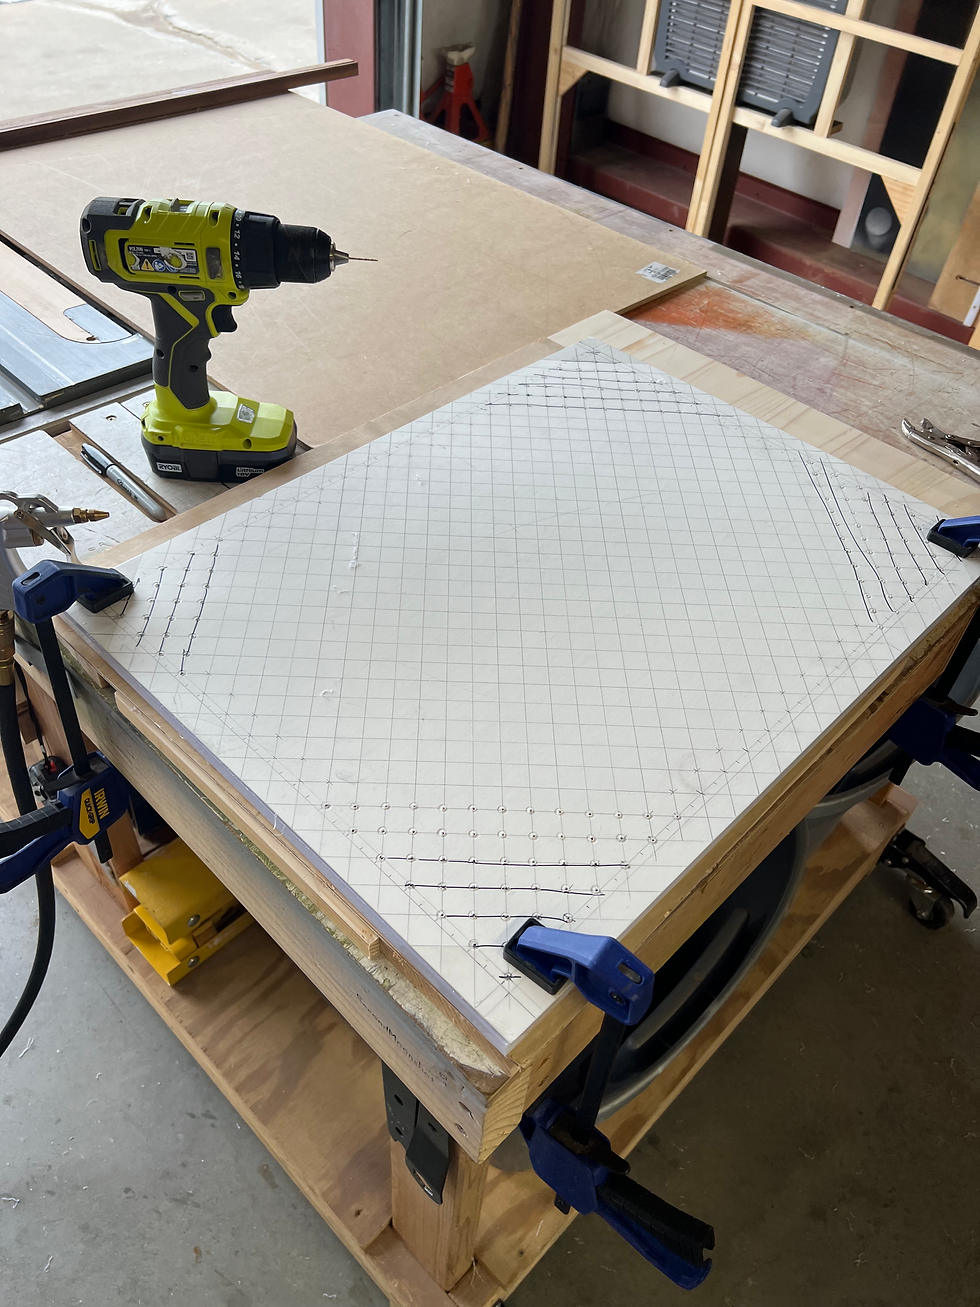
Hmmmm....right now, my holes are essentially 11/16" apart. While this will work, the solutions will have to often travel to the nearest hole and could cause tidelines to travel since there will be more lateral movement. I made an executive decision to move to a 3/8" hole distance by drilling a hole into the center of each square, this will minimize the distance that solutions will have to travel to get to the nearest hole, but basically increases the number of holes I have to drill from 750 or so to about 1500. The final layout is basically a full grid with 3/8" separation - you can do 1/2" or less and still be OK.
I could overcome this by using 2 layers of blotter paper to better distribute the vacuum...but that means I will need to buy more blotter paper which isn't cheap, so while this takes more effort, it also reduces the amount of blotter paper I will be churning through.
This will take a while....
Ugh, ok, holes are all done and build is done!

The final total hole count came out to be 1485. I figured out that the most efficient way was to use the drill on the higher speed and keep compressed air on the bit to keep it cool. I actually alternated between two drills to keep it from getting too hot and every 10 or 15 holes just switched to the other drill. I didn't bother drilling a 1/4" then hit with compressed air, then drill the remaining depth as Gemini suggested, ...too time consuming, so just drilled the hole and I didn't seem to get any melting. I did have to go over most every hole with a small poker and clean out the holes, but that was still faster.


The idea when you put a document on the plenum (top), that you mask off the holes which are not used with some mylar.
I also decided to do a quick YouTube video to go over the final build. Very pleased with the outcome.
Ignore the protruding belly, that will require a separate restoration effort.


Comments